


A quick and easy to create a testing environment for Google Cloud Interconnect
This tutorial shows you how to use Partner Interconnect and Equinix Network Edge to deploy private connectivity between Google Cloud Virtual Private Cloud (VPC) networks and Equinix Metal servers and build a POC or testing environment.
For the purposes of this tutorial, we are using Equinix Network Edge to deploy private, hybrid connectivity between Google Cloud and an Equinix Bare metal server, but you can use the same pattern to establish dedicated connectivity between AWS & GCP, for example (and any other cloud provider on Equinix Fabric).
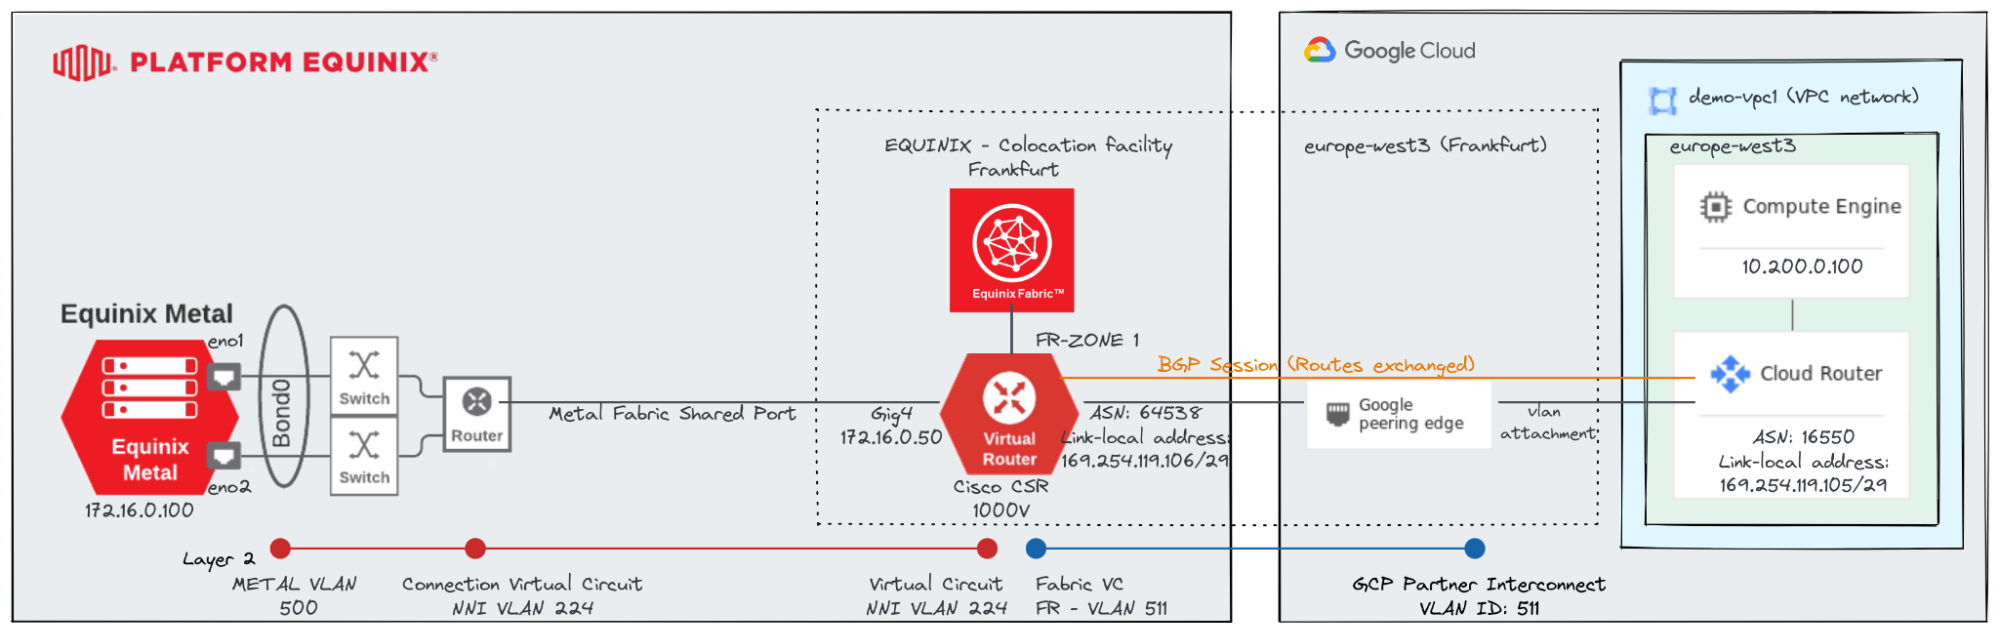
Architecture
The following diagram shows the architecture you will create in this tutorial.
Prerequisites:
- Equinix Fabric Account:
- You can create a 45-day trial account by following this guide.
- Permission to create Connection and Network Edge devices
- Generate Client ID and Client Secret key, from: https://developer.equinix.com/
- Equinix Metal Account:
- A user-level API key for the Equinix Metal API
- GCP Account:
- Permission to create a project or select one already created
- Enable billing.
- Enable APIs: Compute Engine API, and Cloud Deployment Manager API.
TL;DR
After completing this tutorial you will be able to communicate from a virtual machine in GCP (GCE instance) to a bare metal server in Equinix (BMaaS Platform), using private addressing.
- Run terraform automation for creating the Equinix Network Edge Virtual Device and set up GCP Interconnect.
- Run terraform automation for the creation of Equinix Bare Metal server and VLAN.
- Request and configure a Shared Port Connection for L2 connectivity between Equinix Metal and Equinix Fabric NE.
- Connect to your Cisco CSR NE for layer 2 and bgp configuration.
- Finally, check if connectivity is in place and if we can ping from each side.
Step by step:
Step 1: Set up Equinix Network Edge Virtual Device and GCP Interconnect
I. Clone tutorial project.
mkdir -p $HOME/Workspace/demo-gcp-interconnect; cd $HOME/Workspace/demo-gcp-interconnect
git clone https://github.com/palimarium/terraform-equinix-gcp-interconnect.git
II. Use your text editor to set the required parameters. Only the ones with no default value are necessary; the others can be left as they are.
cd terraform-equinix-gcp-interconnect
vim terraform.tfvars
III. Create terraform-runner GCP Service Account.
./tf-service-acccount-chain-setup.sh
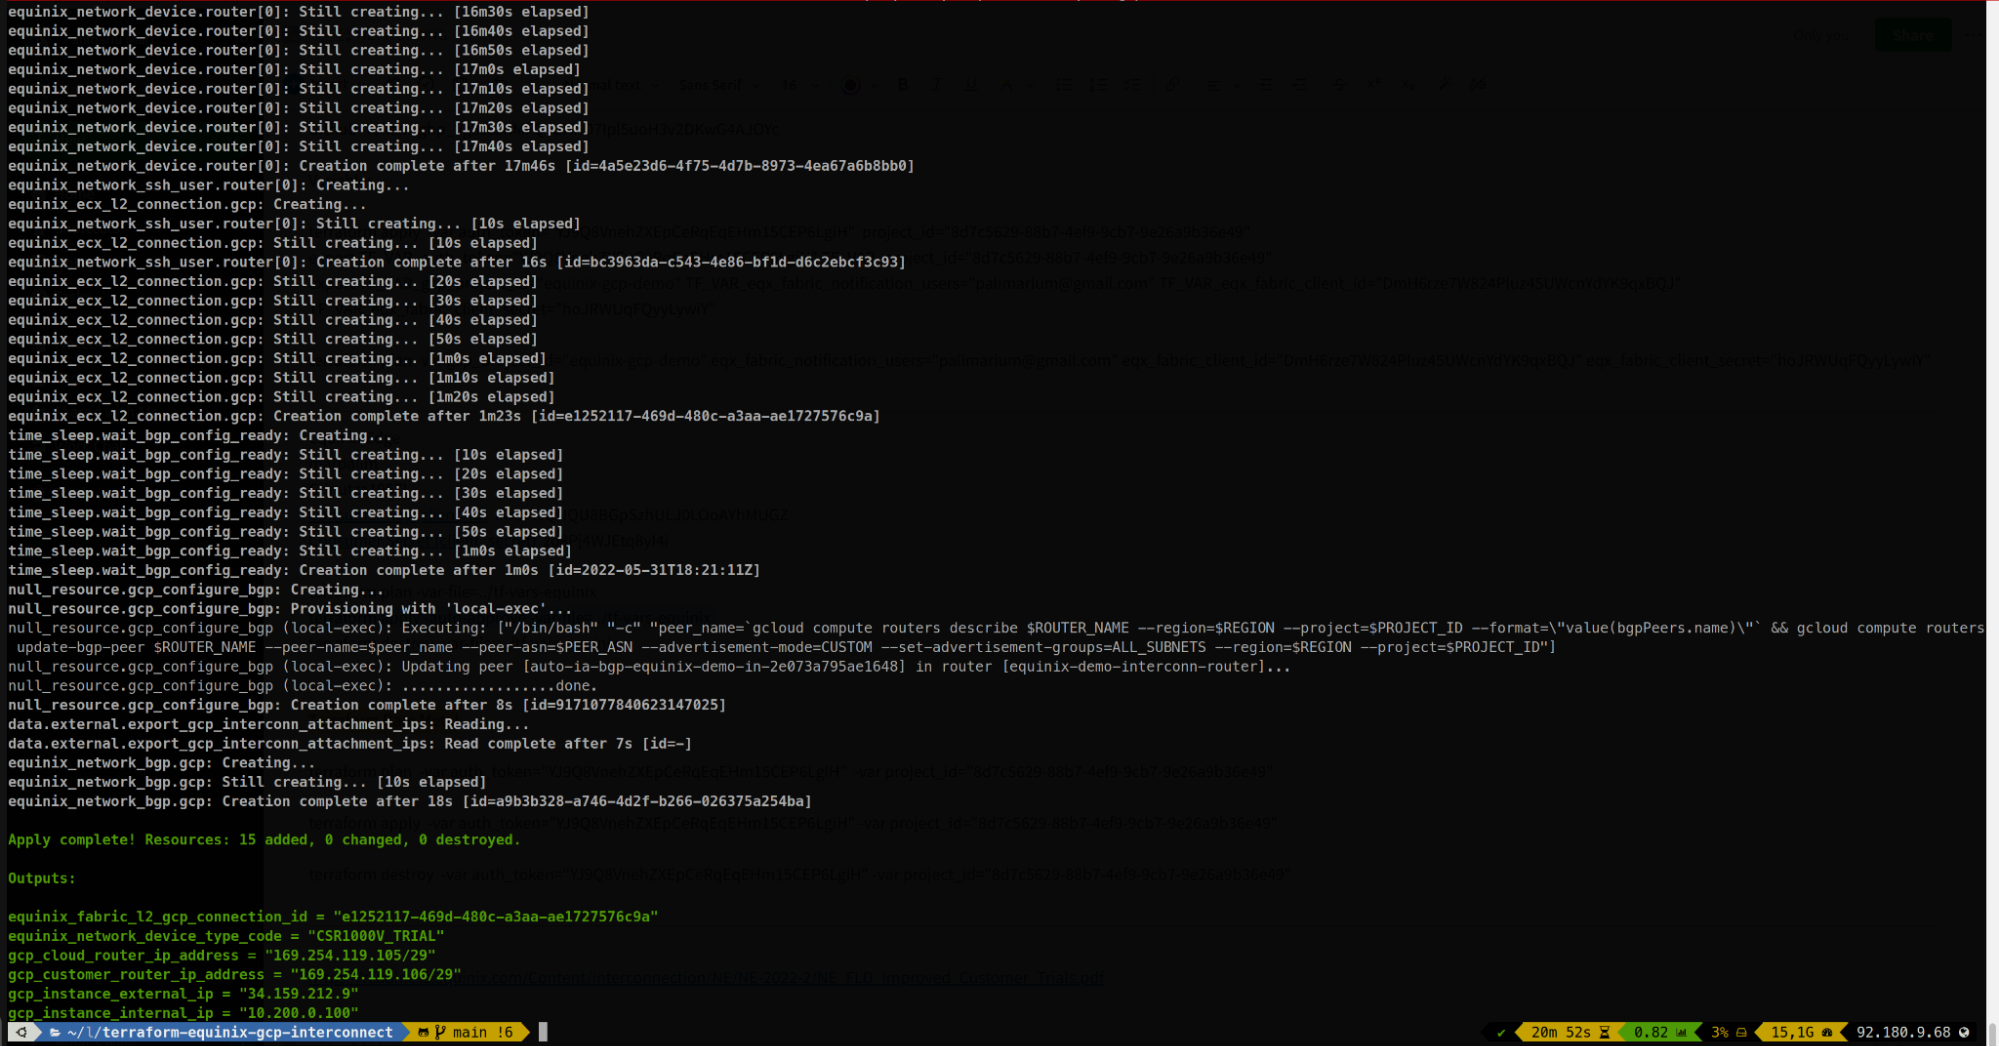
IV. Apply terraform automation.
Step 2: Set up Equinix Metal
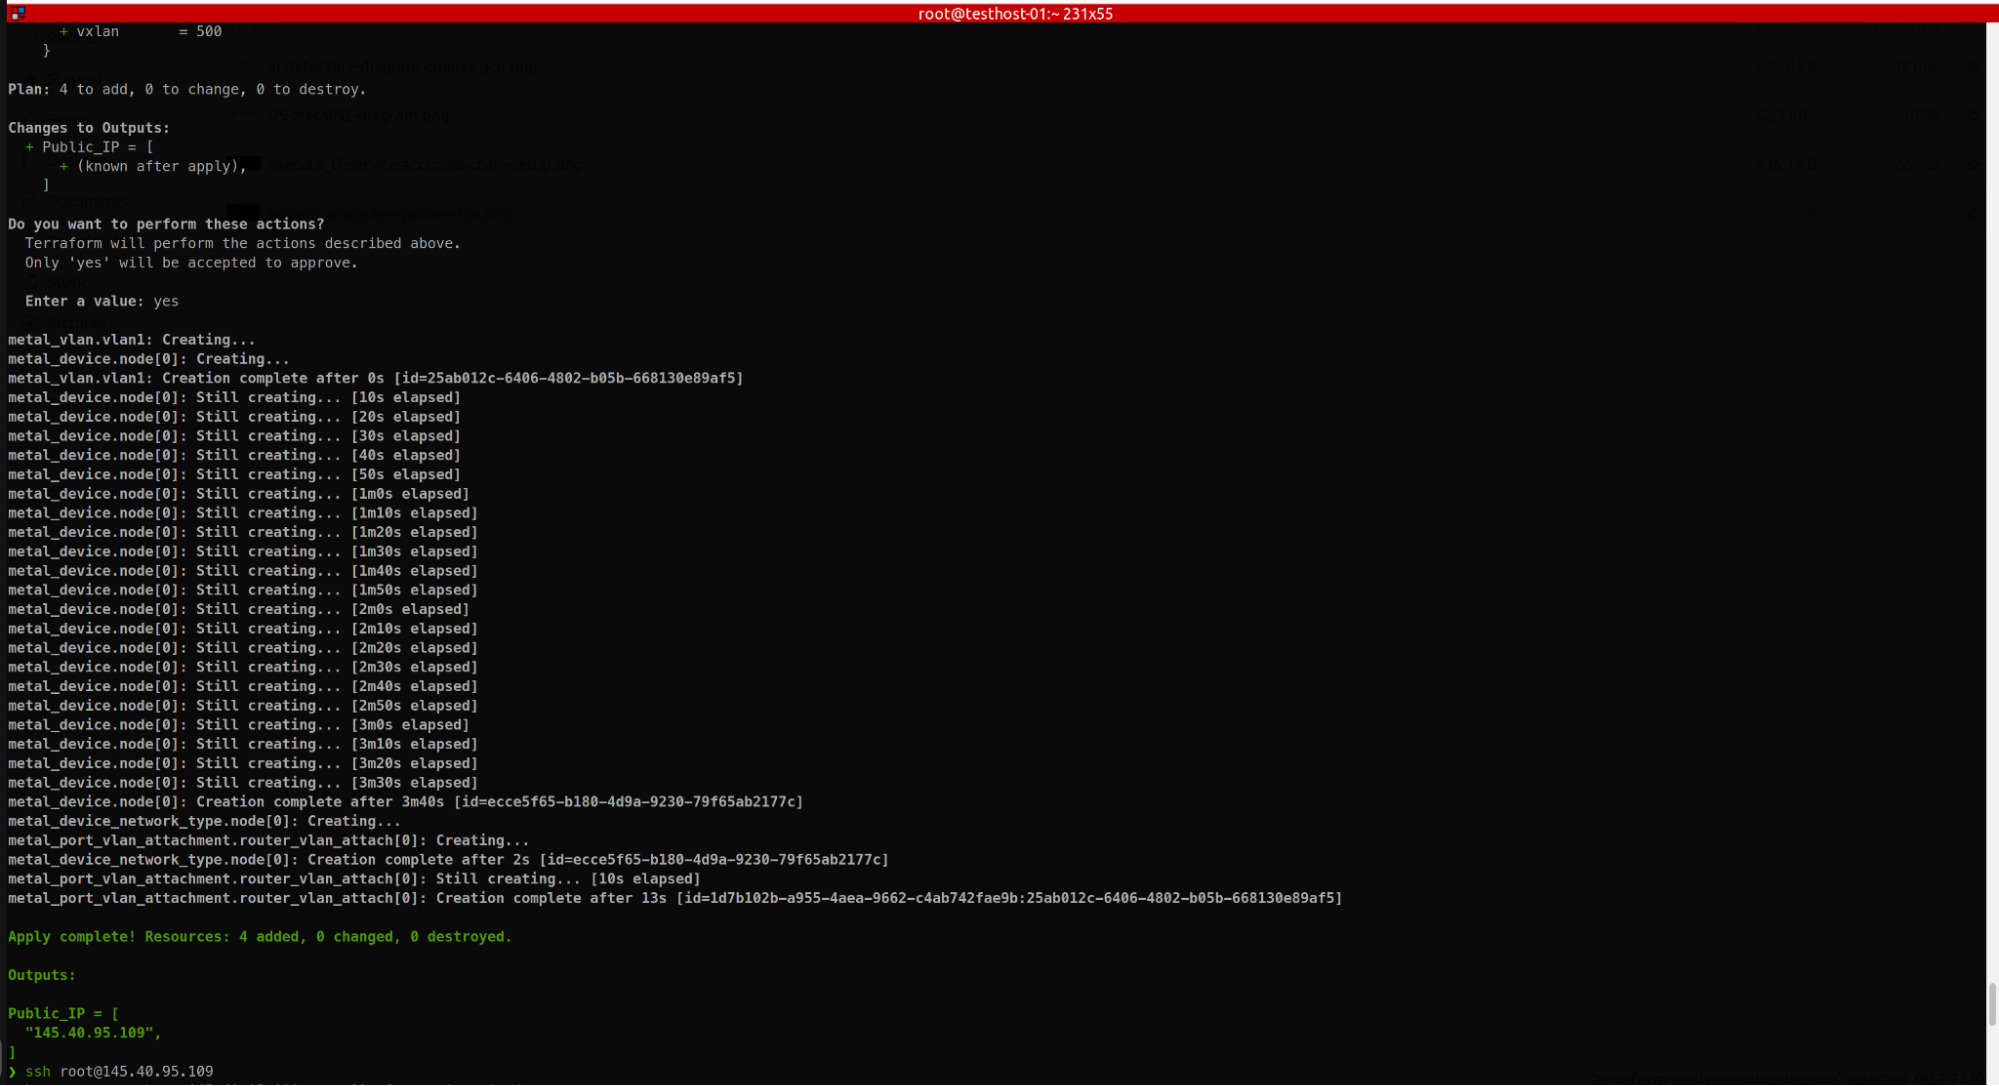
I. Apply terraform automation.
Step 3: Set up a Shared Port Connection between Equinix Metal and Equinix Fabric NE
Setting up a shared port has two components:
I. Completing the request in the Equinix Metal console
To request a connection in the Equinix Metal portal, open the Connections page from the IPs & Networks tab.

II. Setting up the connection in Equinix Fabric
Connections to Equinix Metal shared ports are handled through Equinix Fabric, so log in to the Equinix Fabric portal and follow the documentation steps.
Connecting the Metal VLAN to the Shared Port
Once the L2 connection is ready, between Equinix Metal and Equinix Fabric. You can follow these steps for connecting the Primary Port to the Metal VLAN created by terraform at the previous step 2).
Step 4: Equinix Metal to Equinix Fabric, Layer2 & BGP Configuration
I. Connect to Cisco CSR NE with Putty by using the ssh username & password, generated with terraform.
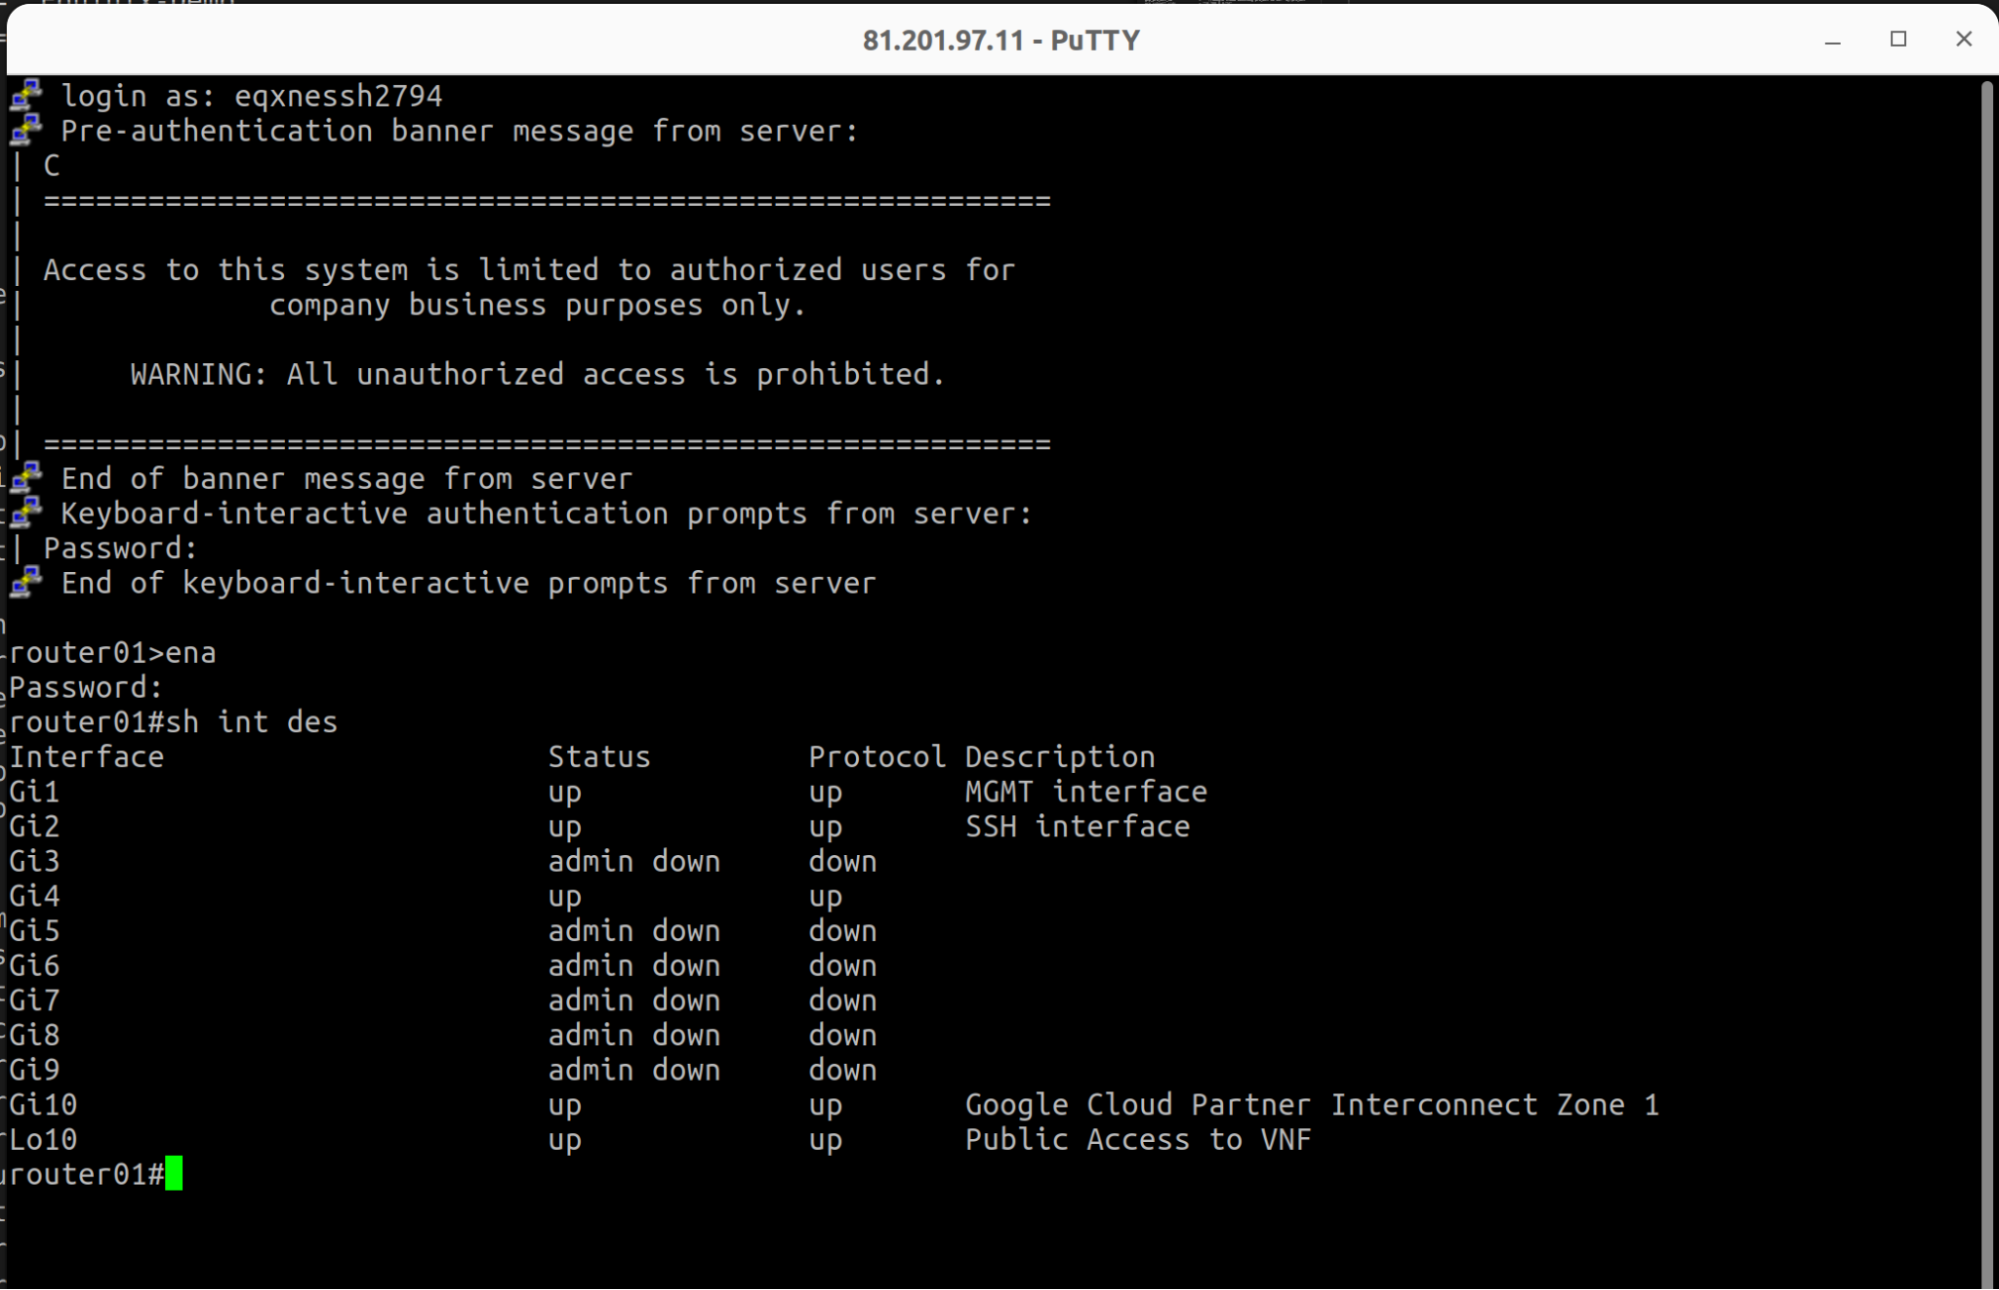
II. In this step, we will configure a basic Layer 2 connection between Network Edge and Equinix Metal. The sub-interface on the Metal server with the IP address 172.16.0.100 has been already created by terraform. We just have to proceed with the Network Edge Configuration by following the steps from here.
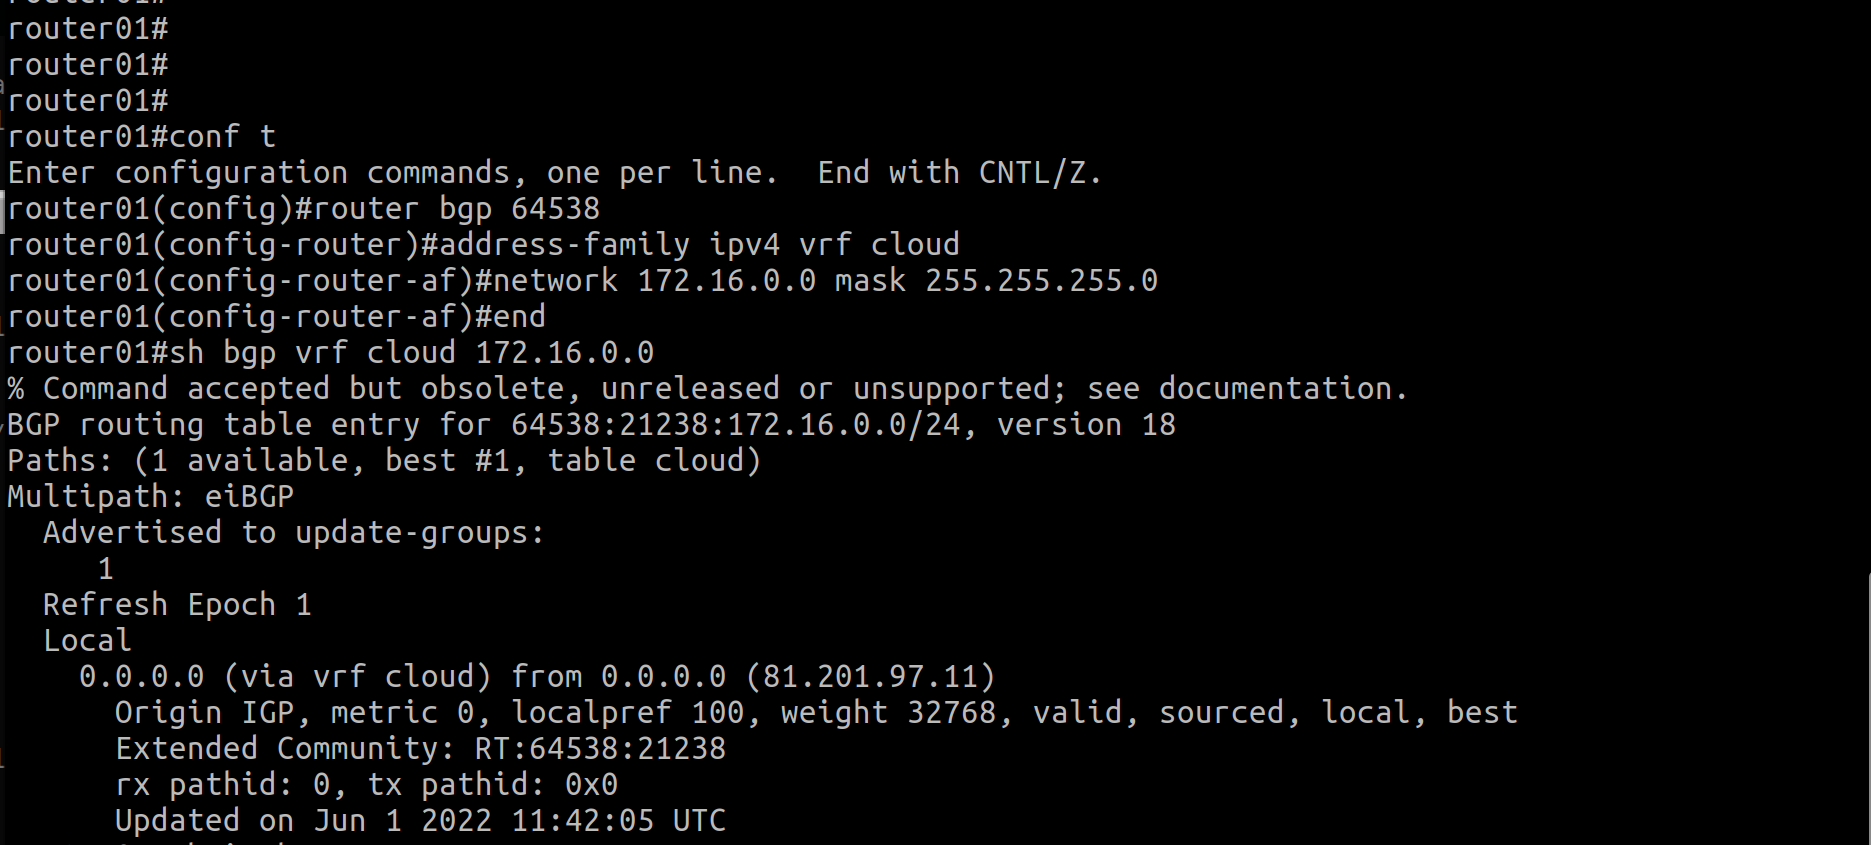
III. In this step, we will configure BGP on Cisco CSR NE device for advertising the 172.16.0.0/24 network.
Step 5: Check if connectivity is in place and if we can ping from each side
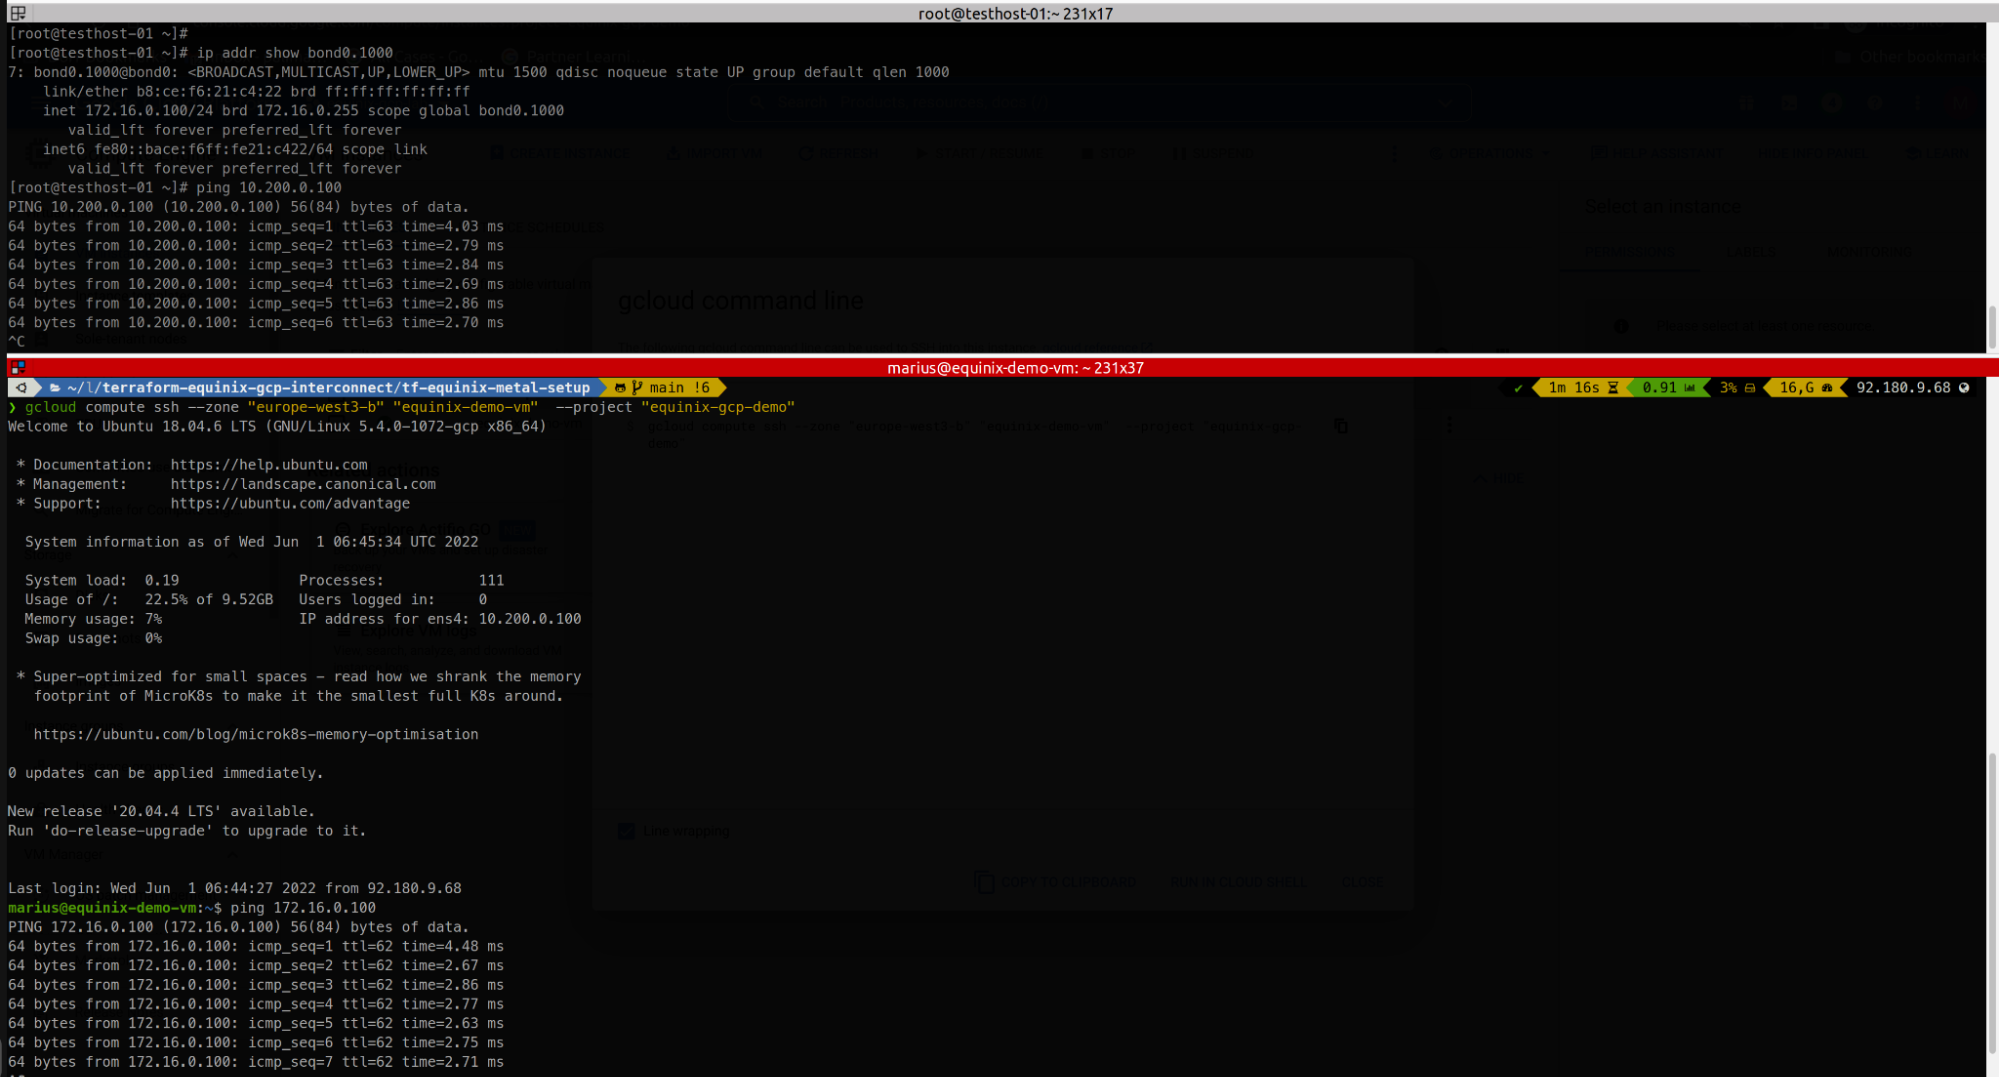
Tutorial Code
The tf code and detailed step-by-step instructions for this tutorial can be found here:
https://github.com/palimarium/terraform-equinix-gcp-interconnect
Wrapping up
Congratulations on completing this tutorial! By running the terraform automation and some additional manual steps, you now have a working private connection between your GCP project and the Equinix Bare Metal server.