


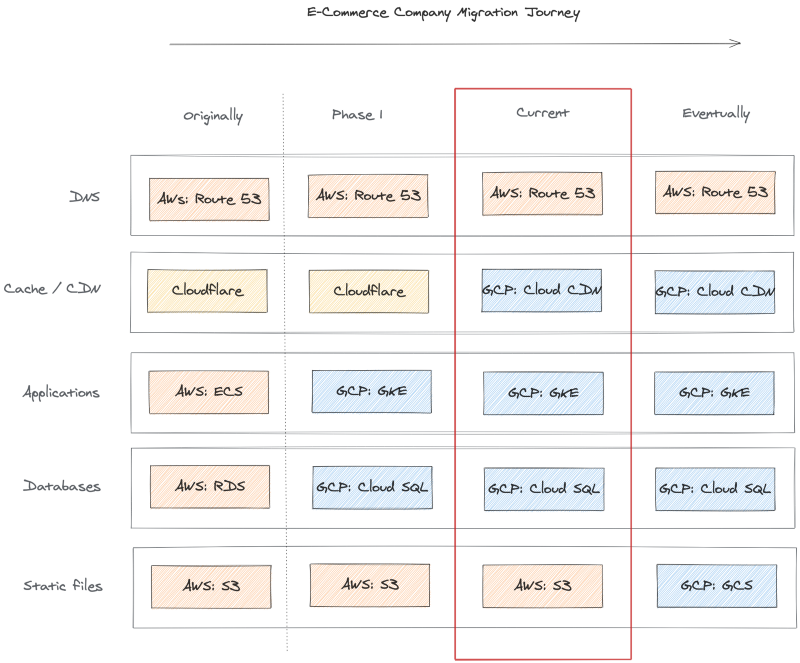
As companies transition their technology stacks to become more cloud-native, a trend we’re seeing is partial cloud migrations, or hybrid cloud configurations, often as interim steps to full migrations.

Recently an e-commerce company was moving its containerized applications from AWS to GCP to take advantage of Google’s managed Kubernetes service, GKE.
Their product catalog files and photos were stored on Amazon’s S3 object storage service, DNS was managed with AWS Route 53, and they leveraged Cloudflare’s CDN service. They migrated databases and deployed their apps in parallel to Kubernetes clusters as an initial step.
Next, they wanted to transition from Cloudflare’s CDN to Google’s, but still leave the static files on S3 for now. Another requirement was to leverage their DNS currently managed with AWS Route 53.
This article provides a step-by-step example of how to cache AWS S3 bucket content from GCP Cloud CDN using a load balancer and network endpoint group (NEG). For simplicity in this example, I am not generating an SSL certificate and adding HTTP(S) frontend, but that would be a typical additional step.
Article Demo Setup
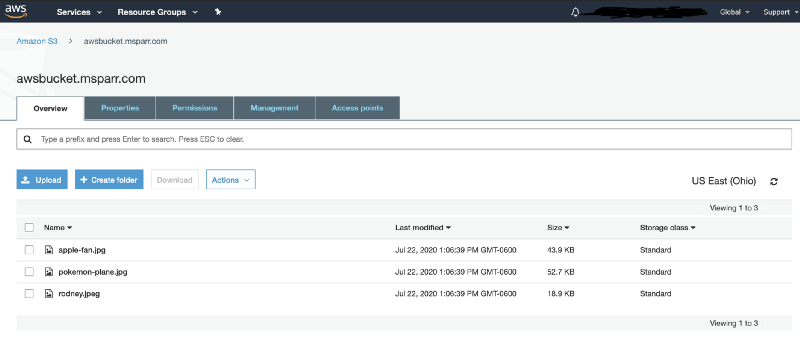
- Create initial S3 bucket with files for testing

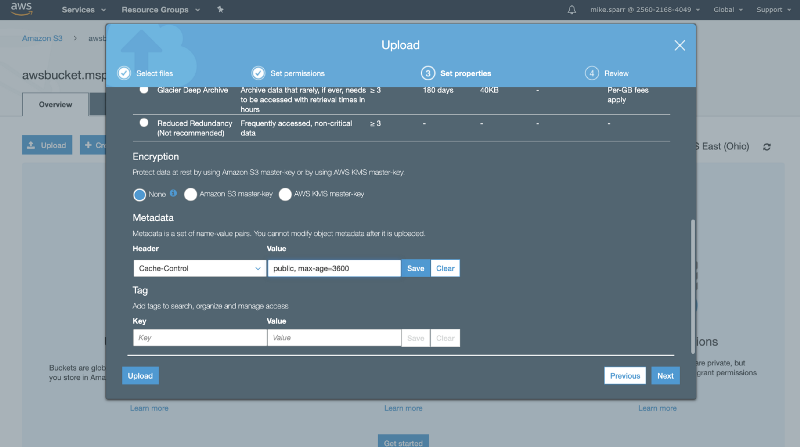
2. Upload test files and edit metadata to add Cache-control header
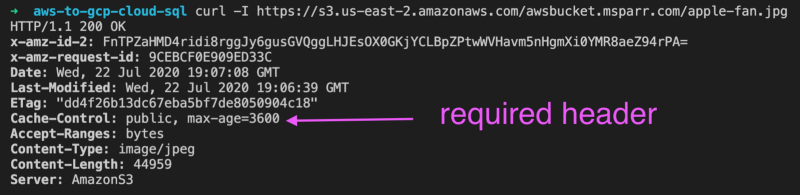
3. Test content is returning the correct headers
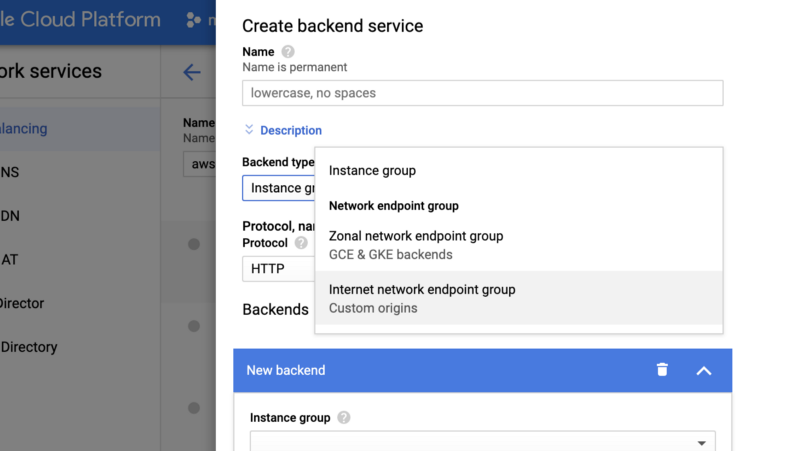
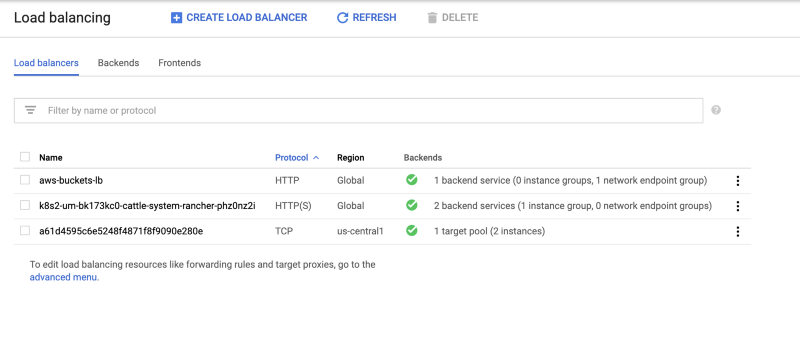
Configure load balancer and NEG on GCP
- Add/edit backend type for “Internet network endpoint group” type
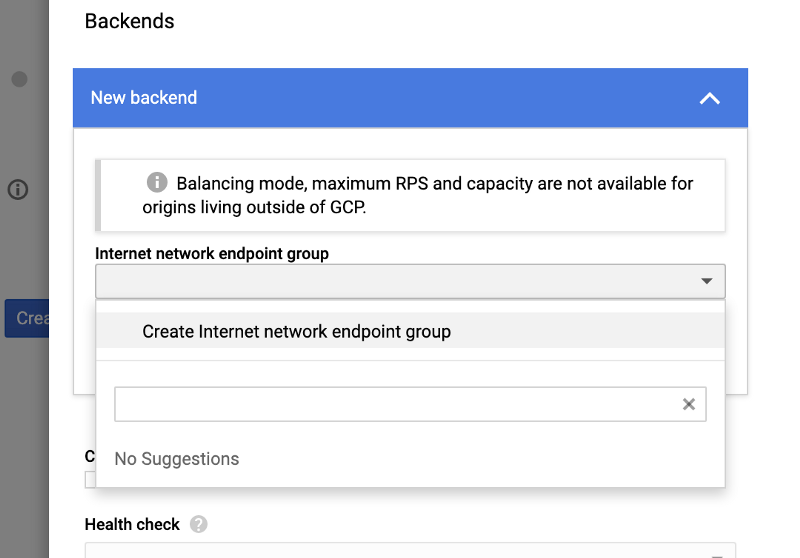
2. Select network endpoint group (NEG) or “create new”
Note: you may have to create the Network Endpoint Group (NEG) first, so it appears in the dropdown menu in your Load Balancer backend config. If you do not see it, you can “Create Internet network endpoint group”, but you’ll need to refresh the load balancer screen for it to appear.
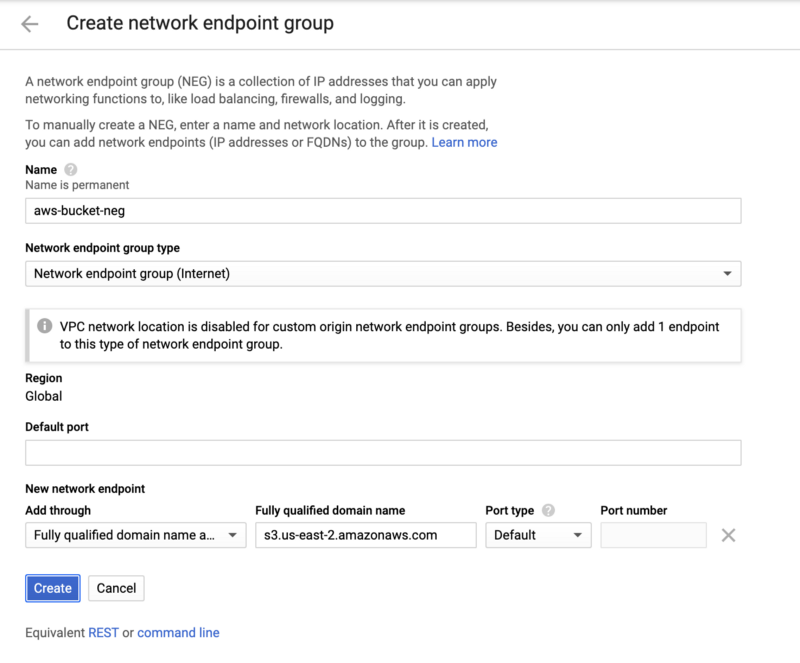
Select “Fully qualified domain name” and enter the FQDN to your S3 bucket location (sometimes you may have your own DNS entry pointing to this and that is fine too).
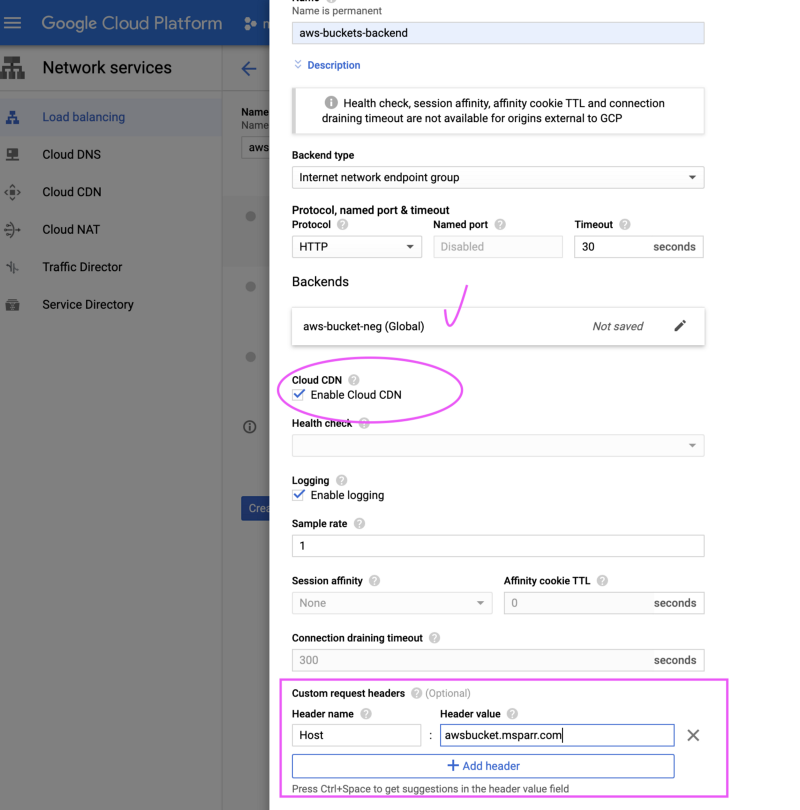
3. Enable Cloud CDN and add custom header (matching S3 bucket hostname)
After selecting the “Backend type” for the external NEG, you need to check the “Enable Cloud CDN” and then expand the options at the bottom to create a custom header.
The trick to make this work is adding the custom host header matching the S3 hostname as shown below.
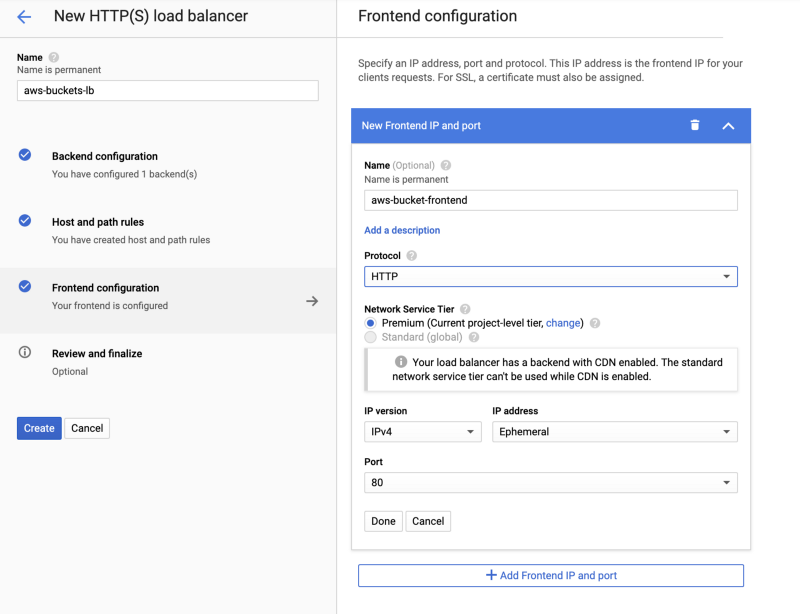
4. Add/edit frontend
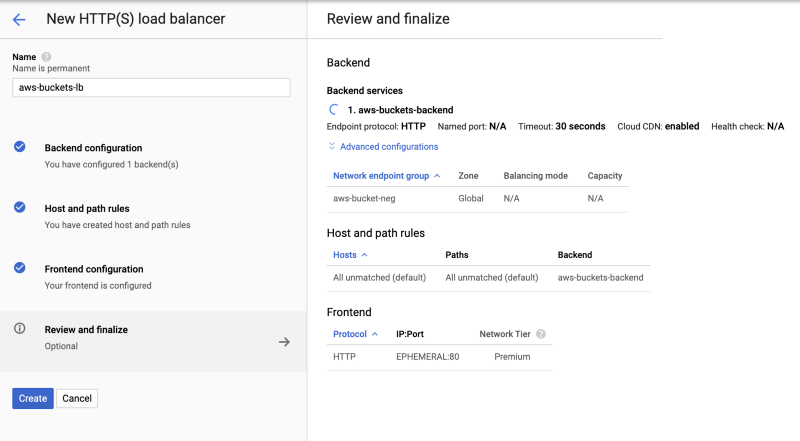
5. Save load balancer and verify configured with NEG
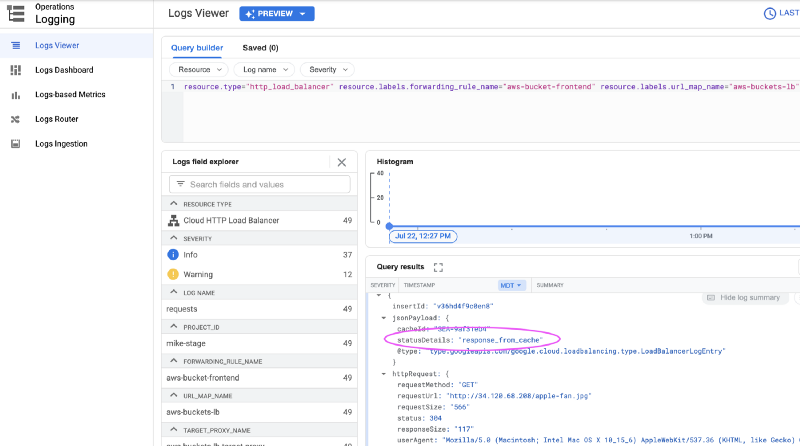
6. Test content is returning and hitting cache
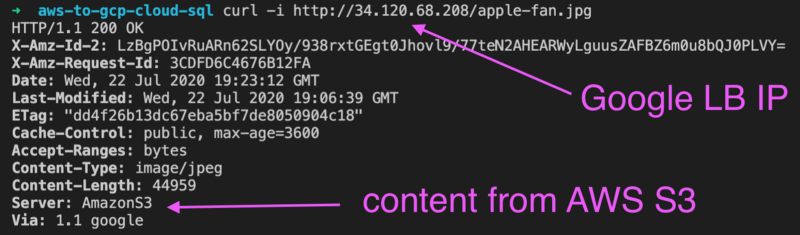
Test a few times in a browser and then check logs (quickest way is Stackdriver logs) and expand an entry and confirm it’s coming from the cache.
Update DNS entries to redirect traffic to Cloud CDN
If you have confirmed everything is working as expected and content is coming from the cache, then when you’re ready you simply edit your DNS entries.
In this case, the CDN was provided by Cloudflare and there was a DNS entry cdn-environment-location.myco.com pointing to CNAME something.cloudflare.com. You simply need to create a new A record pointing to the Google load balancer external IP (i.e. — gcp-lb-development-cdn.myco.com ), and then change the CNAME and point to this new entry.
For precaution, I suggest the day prior to shortening the TTL if necessary on your live CDN entry so if for some reason things go wrong, when you edit the CNAME you could revert and clients caching of the DNS won’t be for too long.
Summary of steps:
- Shorten TTL on existing CDN domain
- Add A record to point to GCP load balancer IP
- Edit CNAME record for existing CDN domain (replace Cloudflare FQDN)
- Test content is routing through Cloud CDN
Cost awareness for cloud solutions
While proxying requests from Cloud CDN to S3 buckets is possible, in order to make it work you must add custom headers and there is a cost for this. Currently, it’s approximately $0.75 / 1 million requests, capped at $500 per month. For a large site with lots of traffic, this can add up.
It may pale in comparison to fees paid at Cloudflare (unsure pricing) but worth noting nevertheless. Long term the plan will be to migrate static files to Google Cloud Storage buckets and since they support the same S3 API, very little code change if any is required.
Summary
As you can see, it is not as daunting as one might think to migrate between technology providers. A safer approach, however, is to break up the work into smaller phases so you can easily rollback if issues to minimize business interruption.